
This blog post demonstrates how you can use the Operator Lifecycle Manager to deploy a Kubernetes Operator to your cluster. Then, you will use the Operator to spin up an Elastic Cloud on Kubernetes (ECK) cluster.
An operator is a software extension that uses custom resources (extension of the Kubernetes API) to manage complex applications on behalf of users.
The artifacts that come with an operator are:
- A set of CRDs that extend the behavior of the cluster without making any change in the code
- A controller that supervises the CRDs, and performs various activities such as spinning up a pod, take a backup, and so on.
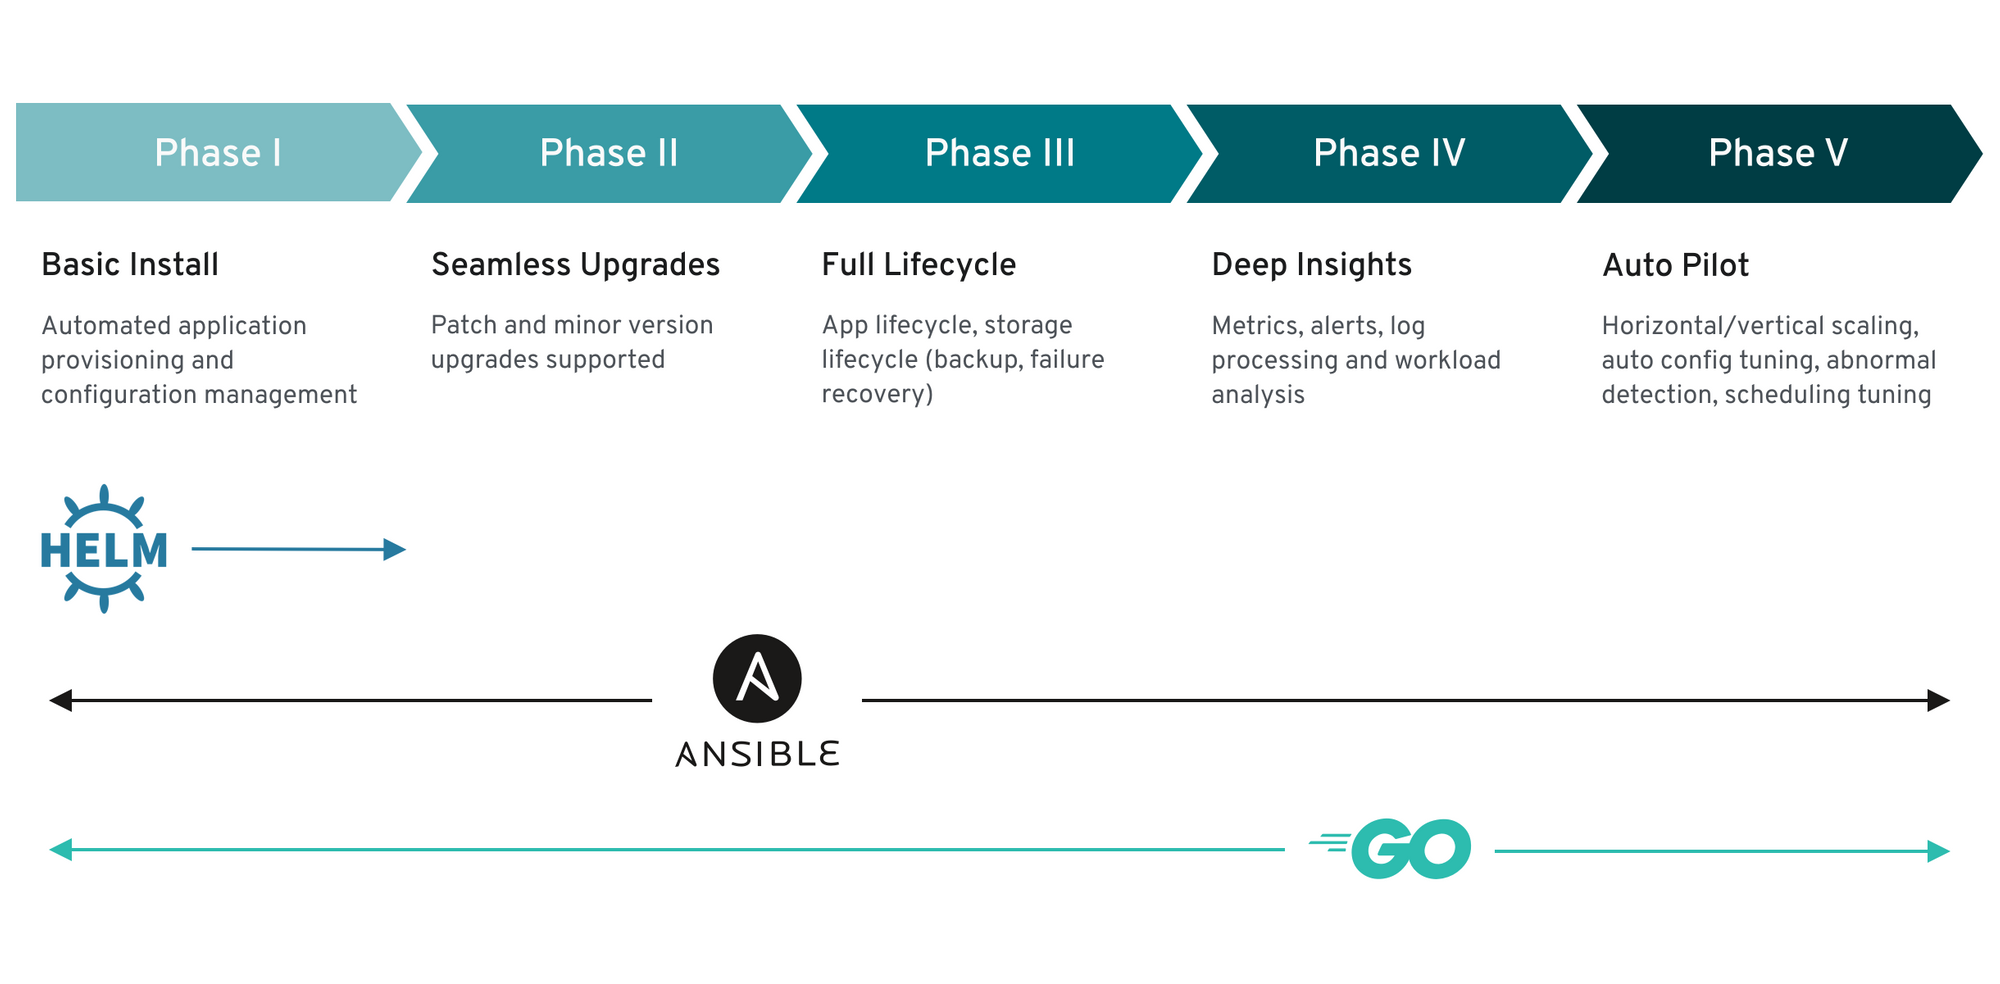
The complexity encapsulated within an Operator can vary, as shown in the below diagram:
Prerequisites
- A Kubernetes cluster (v1.7 or newer) with a control plane and two workers. If you don’t have a running Kubernetes cluster, refer to the “Create a Kubernetes Cluster with Kind” section below.
Create a Kubernetes Cluster with Kind (Optional)
Kind is a tool for running local Kubernetes clusters using Docker container “nodes”. Follow the steps in this section if you don’t have a running Kubernetes cluster:
- Install kind by following the steps from the Kind Quick Start page.
- Place the following spec into a file named
kind-es-cluster.yaml:
kind: Cluster
apiVersion: kind.x-k8s.io/v1alpha4
nodes:
- role: control-plane
- role: worker
- role: worker
- Create a cluster with a control plane and two worker nodes by running the Kind
create clustercommand followed by the--configflag and the name of the configuration file:
kind create cluster --config kind-es-cluster.yaml
Creating cluster "kind" ...
 ✓ Ensuring node image (kindest/node:v1.16.3) 🖼
 ✓ Preparing nodes 📦
 ✓ Writing configuration 📜
 ✓ Starting control-plane 🕹️
 ✓ Installing CNI 🔌
 ✓ Installing StorageClass 💾
 ✓ Joining worker nodes 🚜
Set kubectl context to "kind-kind"
You can now use your cluster with:

kubectl cluster-info --context kind-kind

Have a nice day! 👋
- At this point, you can retrieve the list of services that were started on your cluster:
kubectl cluster-info
Kubernetes master is running at https://127.0.0.1:53519
KubeDNS is running at https://127.0.0.1:53519/api/v1/namespaces/kube-system/services/kube-dns:dns/proxy

To further debug and diagnose cluster problems, use 'kubectl cluster-info dump'.
Install the Operator Lifecycle Manager
In this section, you’ll install the Operator Lifecycle Manager (“OLM”), a tool that helps you manage the Operators deployed to your cluster in an automated fashion.
- Run the following commands to install OLM:
curl -sL https://github.com/operator-framework/operator-lifecycle-manager/releases/download/0.13.0/install.sh | bash -s 0.13.0
customresourcedefinition.apiextensions.k8s.io/clusterserviceversions.operators.coreos.com created
customresourcedefinition.apiextensions.k8s.io/installplans.operators.coreos.com created
customresourcedefinition.apiextensions.k8s.io/subscriptions.operators.coreos.com created
customresourcedefinition.apiextensions.k8s.io/catalogsources.operators.coreos.com created
customresourcedefinition.apiextensions.k8s.io/operatorgroups.operators.coreos.com created
namespace/olm created
namespace/operators created
clusterrole.rbac.authorization.k8s.io/system:controller:operator-lifecycle-manager created
serviceaccount/olm-operator-serviceaccount created
clusterrolebinding.rbac.authorization.k8s.io/olm-operator-binding-olm created
deployment.apps/olm-operator created
deployment.apps/catalog-operator created
clusterrole.rbac.authorization.k8s.io/aggregate-olm-edit created
clusterrole.rbac.authorization.k8s.io/aggregate-olm-view created
operatorgroup.operators.coreos.com/global-operators created
operatorgroup.operators.coreos.com/olm-operators created
clusterserviceversion.operators.coreos.com/packageserver created
catalogsource.operators.coreos.com/operatorhubio-catalog created
Waiting for deployment "olm-operator" rollout to finish: 0 of 1 updated replicas are available...
deployment "olm-operator" successfully rolled out
deployment "catalog-operator" successfully rolled out
Package server phase: Installing
Package server phase: Succeeded
deployment "packageserver" successfully rolled out
Install the ECK Operator
The ECK Operator provides support for managing and monitoring multiple clusters, upgrading to new stack versions, scaling cluster capacity, etc. This section walks through installing the ECK Operator to your Kubernetes cluster:
- Enter the following
kubectl applycommand to install the ECK Operator:
kubectl apply -f https://download.elastic.co/downloads/eck/1.0.0/all-in-one.yaml
customresourcedefinition.apiextensions.k8s.io/apmservers.apm.k8s.elastic.co created
customresourcedefinition.apiextensions.k8s.io/elasticsearches.elasticsearch.k8s.elastic.co created
customresourcedefinition.apiextensions.k8s.io/kibanas.kibana.k8s.elastic.co created
clusterrole.rbac.authorization.k8s.io/elastic-operator created
clusterrolebinding.rbac.authorization.k8s.io/elastic-operator created
namespace/elastic-system created
statefulset.apps/elastic-operator created
serviceaccount/elastic-operator created
validatingwebhookconfiguration.admissionregistration.k8s.io/elastic-webhook.k8s.elastic.co created
service/elastic-webhook-server created
secret/elastic-webhook-server-cert created
- Remember that the ECK Operator is a Kubernetes resource. Thus, you can display it by using the following command:
kubectl get CustomResourceDefinition
NAME                                           CREATED AT
apmservers.apm.k8s.elastic.co                  2020-01-29T07:02:24Z
catalogsources.operators.coreos.com            2020-01-29T06:59:21Z
clusterserviceversions.operators.coreos.com    2020-01-29T06:59:20Z
elasticsearches.elasticsearch.k8s.elastic.co   2020-01-29T07:02:24Z
installplans.operators.coreos.com              2020-01-29T06:59:20Z
kibanas.kibana.k8s.elastic.co                  2020-01-29T07:02:25Z
operatorgroups.operators.coreos.com            2020-01-29T06:59:21Z
subscriptions.operators.coreos.com             2020-01-29T06:59:20Z
- To see more details about a specific CRD, run the
kubectl describe CustomResourceDefinitioncommand followed by the name of the CRD:
kubectl describe CustomResourceDefinition elasticsearches.elasticsearch.k8s.elastic.co
Name:         elasticsearches.elasticsearch.k8s.elastic.co
Namespace:
Labels:       <none>
Annotations:  kubectl.kubernetes.io/last-applied-configuration:
                {"apiVersion":"apiextensions.k8s.io/v1beta1","kind":"CustomResourceDefinition","metadata":{"annotations":{},"creationTimestamp":null,"name...
API Version:  apiextensions.k8s.io/v1
Kind:         CustomResourceDefinition
Metadata:
  Creation Timestamp:  2020-01-29T07:02:24Z
  Generation:          1
  Resource Version:    1074
  Self Link:           /apis/apiextensions.k8s.io/v1/customresourcedefinitions/elasticsearches.elasticsearch.k8s.elastic.co
  UID:                 2332769c-ead3-4208-b6bd-68b8cfcb3692
Spec:
  Conversion:
    Strategy:  None
  Group:       elasticsearch.k8s.elastic.co
  Names:
    Categories:
      elastic
    Kind:       Elasticsearch
    List Kind:  ElasticsearchList
    Plural:     elasticsearches
    Short Names:
      es
    Singular:               elasticsearch
  Preserve Unknown Fields:  true
  Scope:                    Namespaced
  Versions:
    Additional Printer Columns:
      Json Path:    .status.health
      Name:         health
      Type:         string
      Description:  Available nodes
      Json Path:    .status.availableNodes
This output was truncated for brevity
- You check the progress of the installation with:
kubectl -n elastic-system logs -f statefulset.apps/elastic-operator
{"level":"info","@timestamp":"2020-01-27T14:57:57.656Z","logger":"controller-runtime.controller","message":"Starting workers","ver":"1.0.0-6881438d","controller":"license-controller","worker count":1}
{"level":"info","@timestamp":"2020-01-27T14:57:57.757Z","logger":"controller-runtime.controller","message":"Starting EventSource","ver":"1.0.0-6881438d","controller":"elasticsearch-controller","source":"kind source: /, Kind="}
{"level":"info","@timestamp":"2020-01-27T14:57:57.758Z","logger":"controller-runtime.controller","message":"Starting EventSource","ver":"1.0.0-6881438d","controller":"elasticsearch-controller","source":"kind source: /, Kind="}
{"level":"info","@timestamp":"2020-01-27T14:57:57.759Z","logger":"controller-runtime.controller","message":"Starting EventSource","ver":"1.0.0-6881438d","controller":"elasticsearch-controller","source":"channel source: 0xc00003a870"}
{"level":"info","@timestamp":"2020-01-27T14:57:57.759Z","logger":"controller-runtime.controller","message":"Starting Controller","ver":"1.0.0-6881438d","controller":"elasticsearch-controller"}
{"level":"info","@timestamp":"2020-01-27T14:57:57.760Z","logger":"controller-runtime.controller","message":"Starting workers","ver":"1.0.0-6881438d","controller":"elasticsearch-controller","worker count":1}
Note that the above output was truncated for brevity.
- List the pods running in the
elastic-systemnamespace with:
kubectl get pods -n elastic-system
NAME                 READY   STATUS    RESTARTS   AGE
elastic-operator-0   1/1     Running   0          11m
Make sure the status is Running before moving on.
Deploy an Elasticsearch Cluster
In this section, we’ll walk you through the process of deploying an Elasticsearch cluster with the Kubernetes Operator.
- Create a file called
elastic-search-cluster.yamlwith the following content:
apiVersion: elasticsearch.k8s.elastic.co/v1
kind: Elasticsearch
metadata:
  name: quickstart
spec:
  version: 7.5.2
  nodeSets:
  - name: default
    count: 2
    config:
      node.master: true
      node.data: true
      node.ingest: true
      node.store.allow_mmap: false
Things to note in the above output:
- the
versionparameter specifies the Elasticsearch version the Operator will deploy - the
countparameter sets the number of database nodes. Make sure it’s not greater than the number of nodes in your Kubernetes cluster.
- Create a two-node Elasticsearch cluster by entering the following command:
kubectl apply -f elastic-search-cluster.yaml
elasticsearch.elasticsearch.k8s.elastic.co/quickstart created
Behind the scenes, the Operator automatically creates and manages the resources needed to achieve the desired state.
- You can now run the following command to see the status of the newly created Elasticsearch cluster:
kubectl get elasticsearch
NAME         HEALTH    NODES   VERSION   PHASE   AGE
quickstart   unknown           7.5.2             3m51s
Note that the HEALTH status has not been reported yet. It takes a few minutes for the process to complete. Then, the HEALTH status will show as green:
kubectl get elasticsearch
NAME         HEALTH   NODES   VERSION   PHASE   AGE
quickstart   green    2       7.5.2     Ready   8m47s
- Check the status of the pods running in your cluster with:
kubectl get pods --selector='elasticsearch.k8s.elastic.co/cluster-name=quickstart'
NAME                      READY   STATUS    RESTARTS   AGE
quickstart-es-default-0   1/1     Running   0          9m18s
quickstart-es-default-1   1/1     Running   0          9m18s
Verify Your Elasticsearch Installation
To verify the installation, follow these steps.
- The Operator exposes the service with a static IP address. Run the following
kubectl get servicecommand to see it:
kubectl get service quickstart-es-http
NAME                 TYPE        CLUSTER-IP      EXTERNAL-IP   PORT(S)    AGE
quickstart-es-http   ClusterIP   10.103.196.28   <none>        9200/TCP   15m
- To forward all connections made to
localhost:9200to port 9200 of the pod running thequickstart-es-httpservice, type the following command in a new terminal window:
kubectl port-forward service/quickstart-es-http 9200
Forwarding from 127.0.0.1:9200 -> 9200
Forwarding from [::1]:9200 -> 9200
- Move back to the first terminal window. The password for the
elasticuser is stored in a Kubernetes secret. Use the following command to retrieve the password, and save it into an environment variable calledPASSWORD:
PASSWORD=$(kubectl get secret quickstart-es-elastic-user -o=jsonpath='{.data.elastic}' | base64 --decode)
- At this point, you can use
curlto make a request:
curl -u "elastic:$PASSWORD" -k "https://localhost:9200"
{
  "name" : "quickstart-es-default-0",
  "cluster_name" : "quickstart",
  "cluster_uuid" : "g0_1Vk9iQoGwFWYdzUqfig",
  "version" : {
    "number" : "7.5.2",
    "build_flavor" : "default",
    "build_type" : "docker",
    "build_hash" : "8bec50e1e0ad29dad5653712cf3bb580cd1afcdf",
    "build_date" : "2020-01-15T12:11:52.313576Z",
    "build_snapshot" : false,
    "lucene_version" : "8.3.0",
    "minimum_wire_compatibility_version" : "6.8.0",
    "minimum_index_compatibility_version" : "6.0.0-beta1"
  },
  "tagline" : "You Know, for Search"
}
Deploy Kibana
This section walks through creating a new Kibana cluster using the Kubernetes Operator.
- Create a file called
kibana.yamlwith the following content:
apiVersion: kibana.k8s.elastic.co/v1
kind: Kibana
metadata:
  name: quickstart
spec:
  version: 7.5.1
  count: 1
  elasticsearchRef:
    name: quickstart
  podTemplate:
    metadata:
      labels:
        foo: kibana
    spec:
      containers:
        - name: kibana
          resources:
            requests:
              memory: 1Gi
              cpu: 0.5
            limits:
              memory: 1Gi
              cpu: 1
- Enter the following
kubectl applycommand to create a Kibana cluster:
kubectl apply -f kibana.yaml
kibana.kibana.k8s.elastic.co/quickstart created
- During the installation, you can check on the progress by running:
kubectl get kibana
NAME         HEALTH   NODES   VERSION   AGE
quickstart                    7.5.1     3s
Note that in the above output, the HEALTH status hasn’t been reported yet.
Once the installation is completed, the HEALTH status will show as green:
kubectl get kibana
NAME         HEALTH   NODES   VERSION   AGE
quickstart   green    1       7.5.1     104s
- At this point, you can list the Kibana pods by entering the following
kubectl get podscommand:
kubectl get pod --selector='kibana.k8s.elastic.co/name=quickstart'
NAME                             READY   STATUS    RESTARTS   AGE
quickstart-kb-7578b8d8fc-ftvbz   1/1     Running   0          70s
Verify Your Kibana Installation
Follow these steps to verify your Kibana installation.
- The Kubernetes Operator has created a
ClusterIPservice for Kibana. You can retrieve it like this:
kubectl get service quickstart-kb-http
NAME                 TYPE        CLUSTER-IP     EXTERNAL-IP   PORT(S)    AGE
quickstart-kb-http   ClusterIP   10.98.126.75   <none>        5601/TCP   11m
- To make the service available on your host, type the following command in a new terminal window:
kubectl port-forward service/quickstart-kb-http 5601
Forwarding from 127.0.0.1:5601 -> 5601
Forwarding from [::1]:5601 -> 5601
- To access Kibana, you need the password for the
elasticuser. You’ve already saved it into an environment variable calledPASSWORDin Step 3 of the Verify Your Elasticsearch Installation section. You can now display it with:
echo $PASSWORD
vrfr6b6v4687hnldrc72kb4q
In our example, the password is vrfr6b6v4687hnldrc72kb4q but yours will be different.
- Now, you can access Kibana by pointing your browser to https://localhost:5601
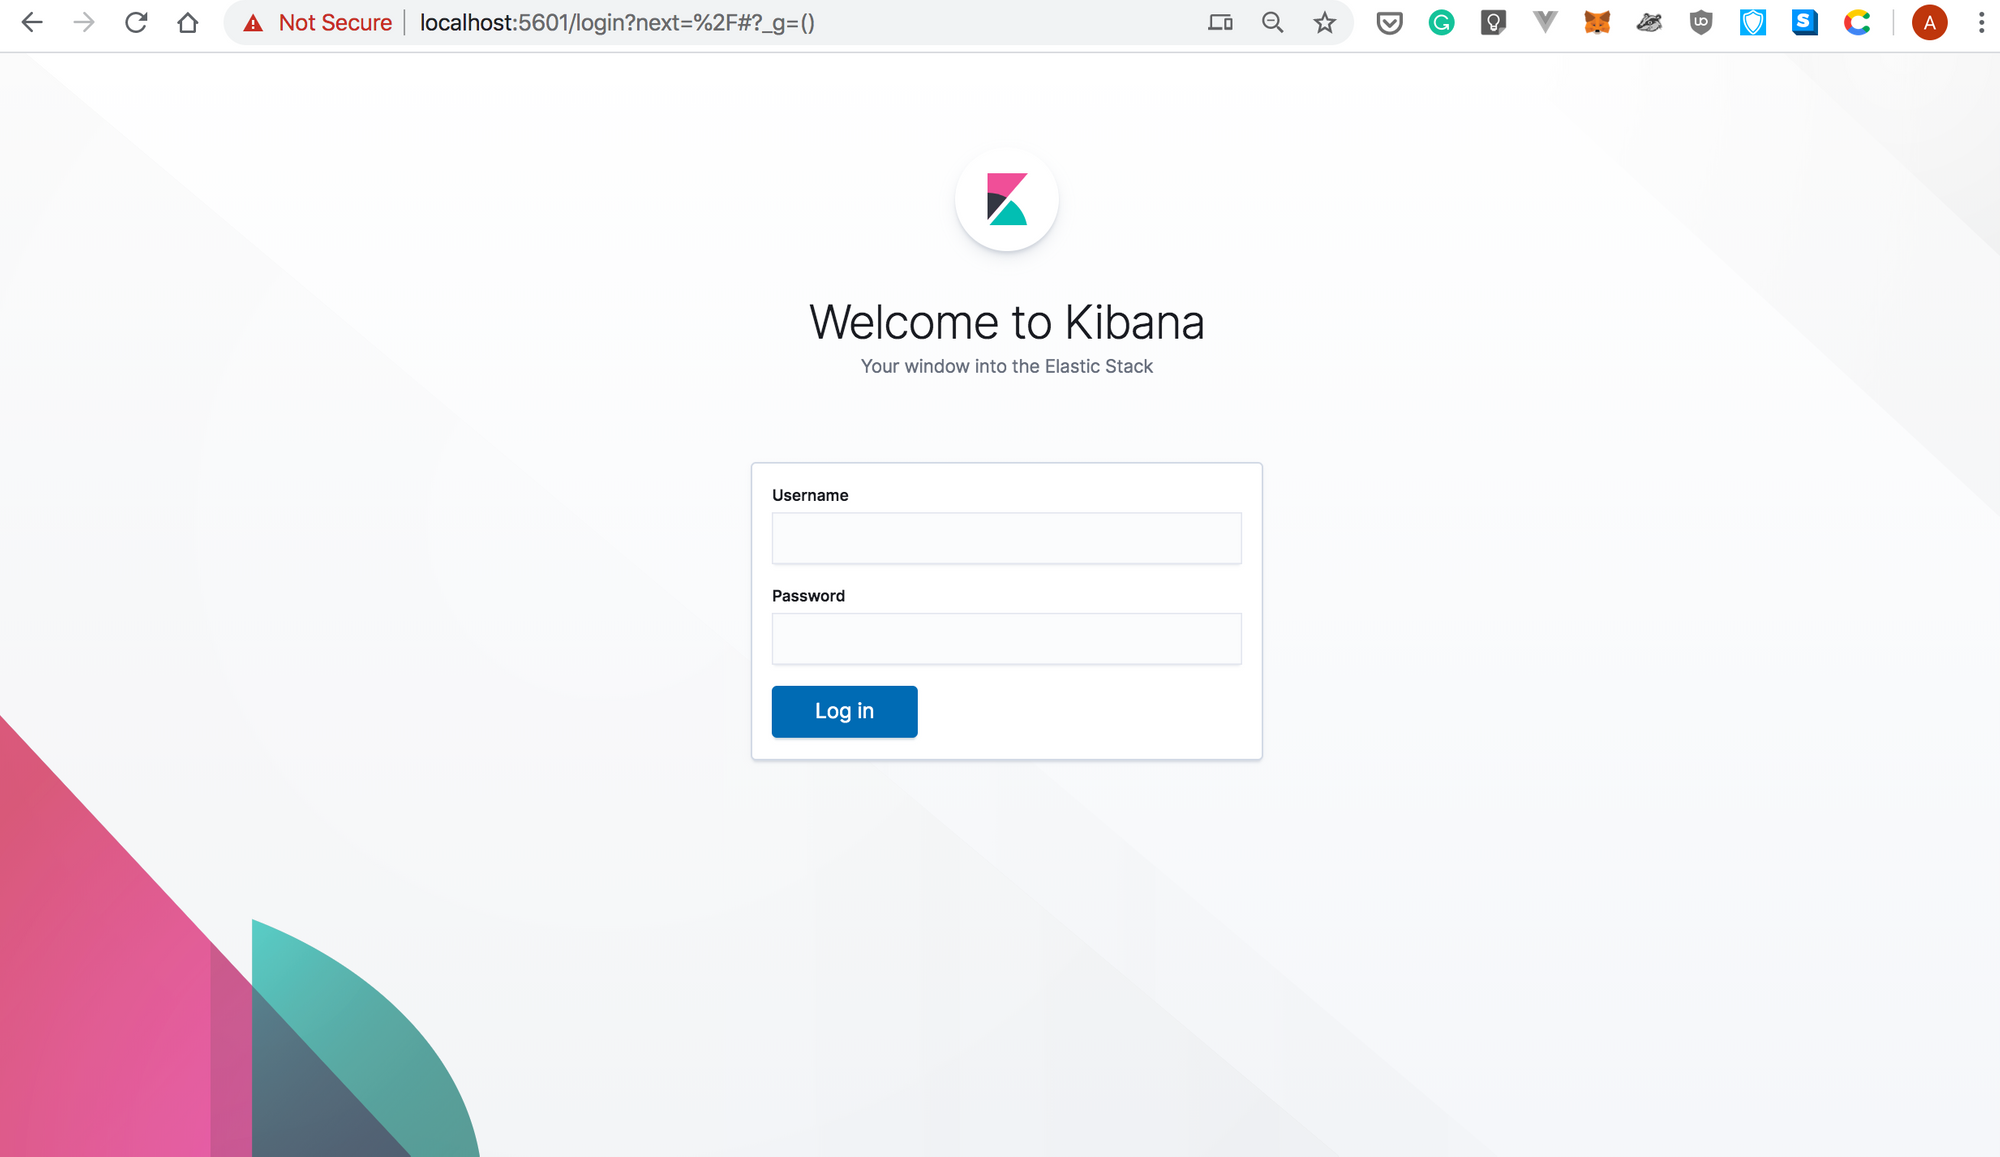
- Log in using the
elasticusername and the password you retrieved earlier:
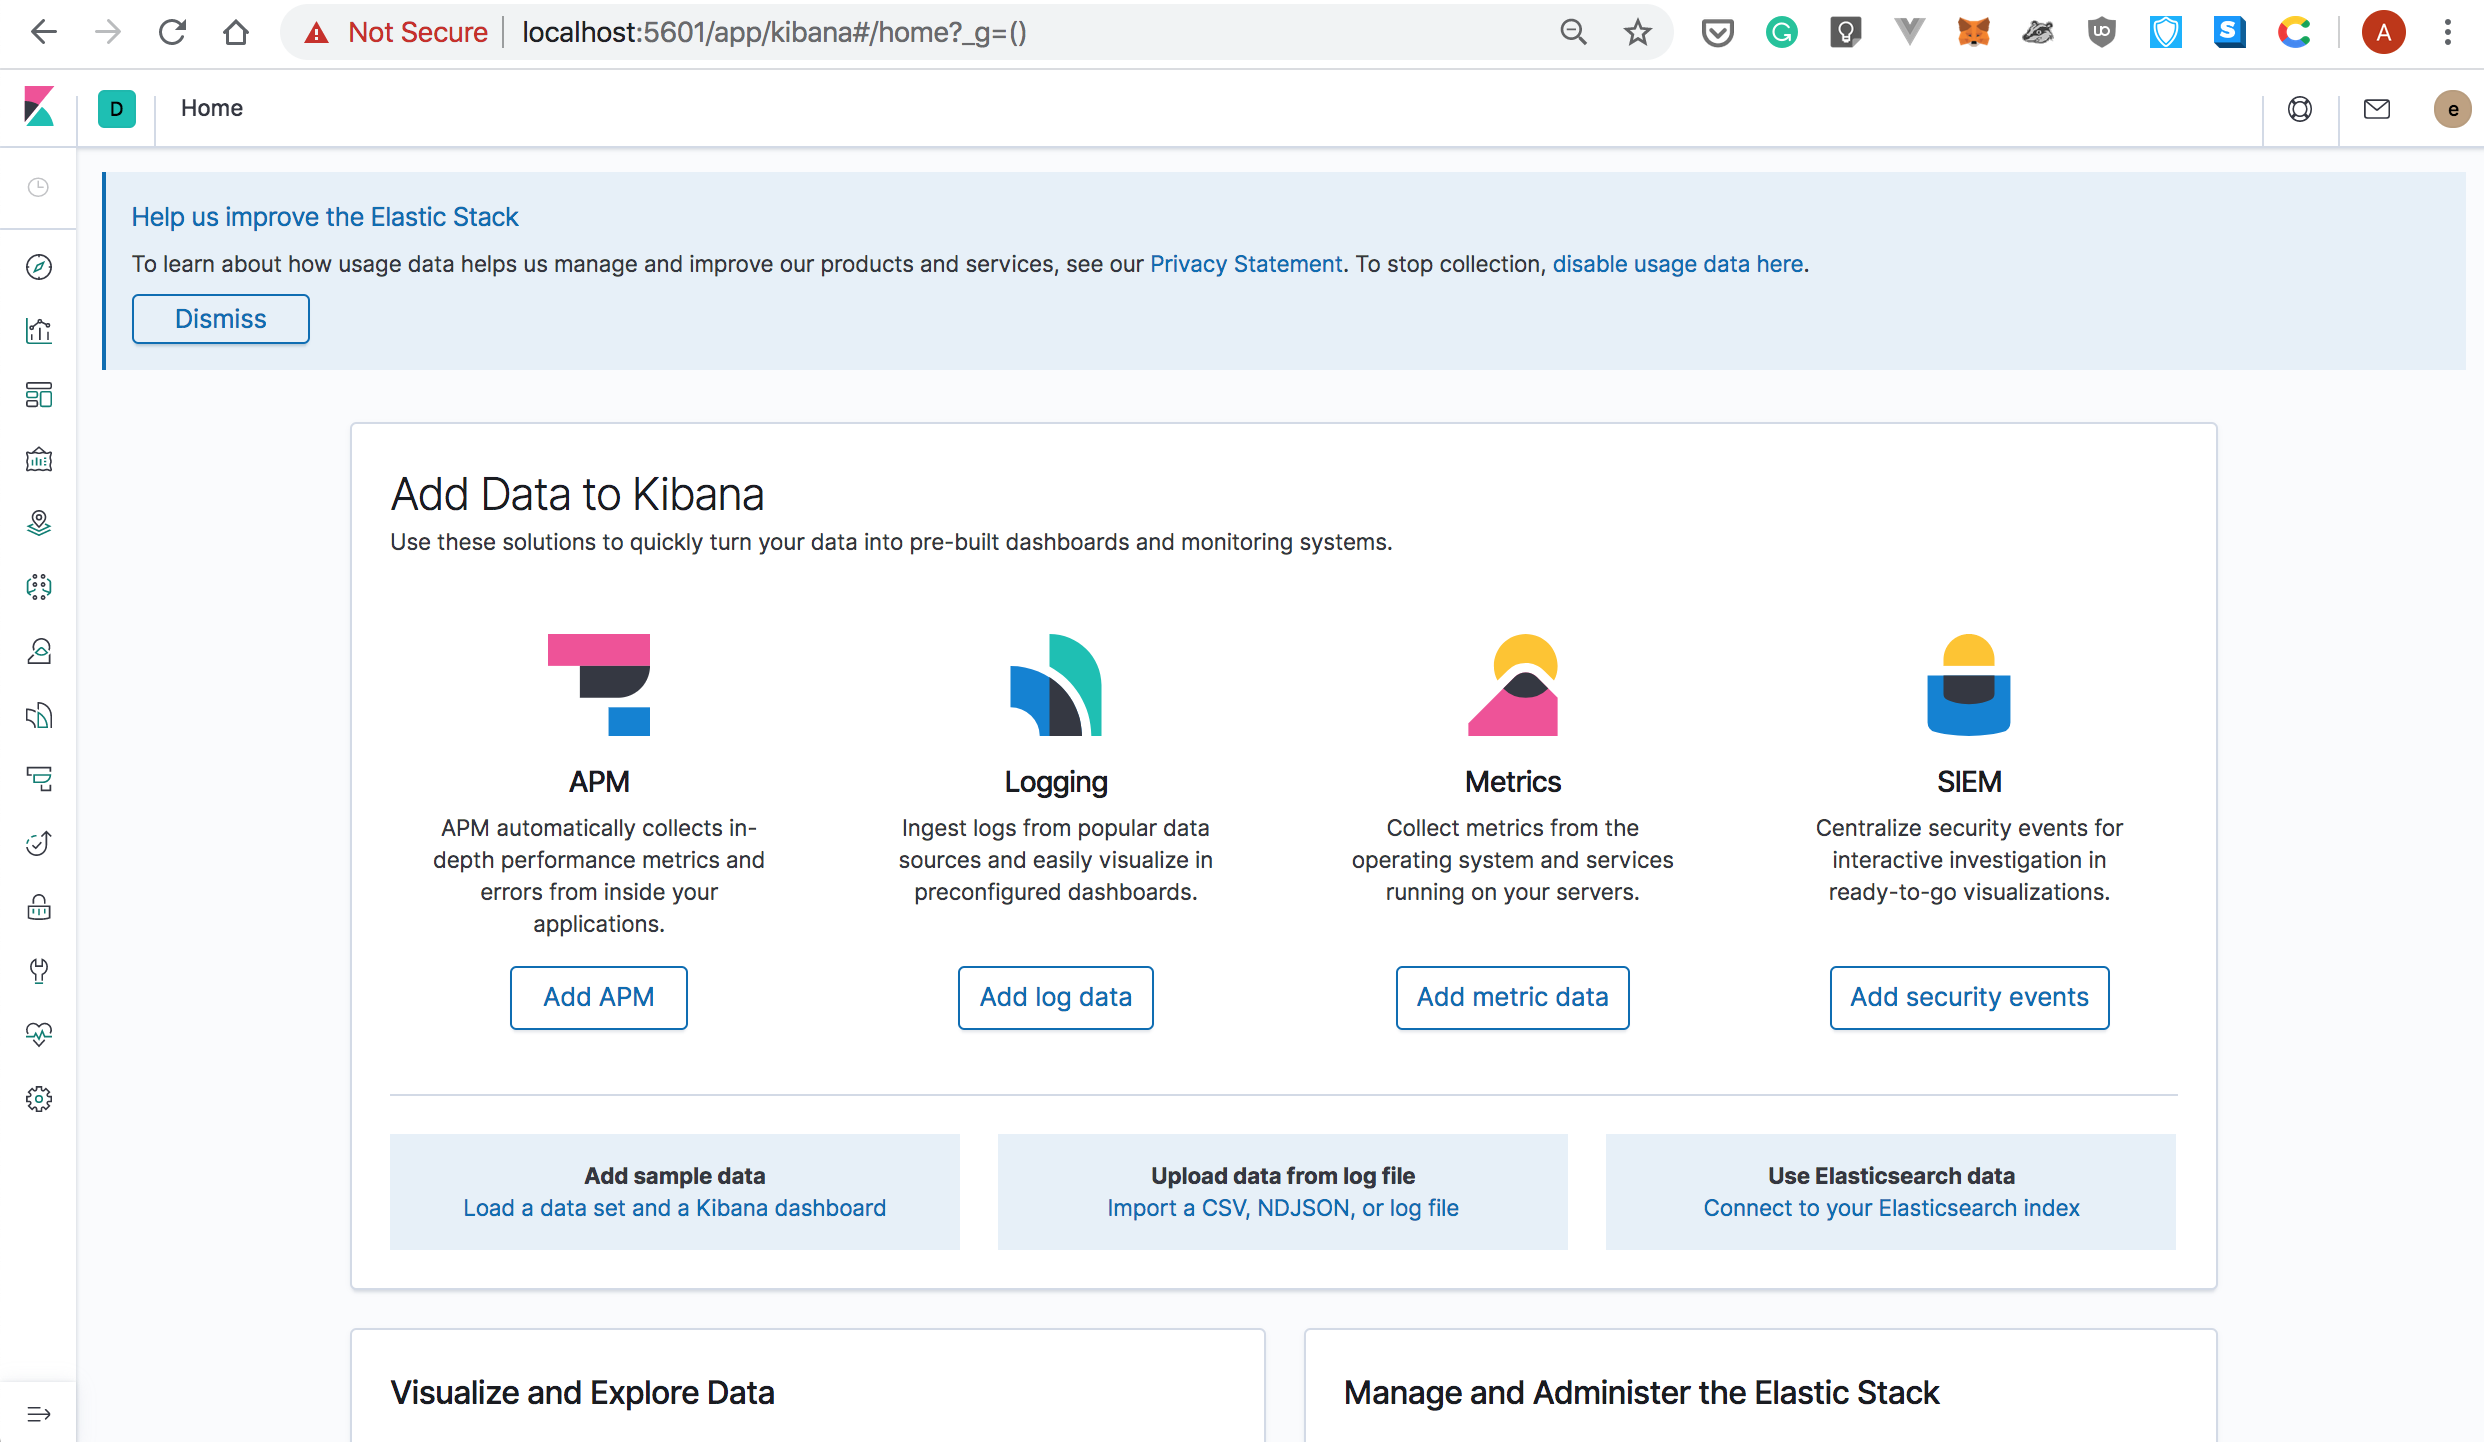
Manage Your ECK Cluster with the Kubernetes Operator
In this section, you’ll learn how to scale down and up your ECK Cluster.
- To scale down, modify the number of nodes running Elasticsearch by specifying
nodeSets.count: 1in yourelasticsearch.yamlfile. Your spec should look like this:
apiVersion: elasticsearch.k8s.elastic.co/v1
kind: Elasticsearch
metadata:
  name: quickstart
spec:
  version: 7.5.2
  nodeSets:
  - name: default
    count: 1
    config:
      node.master: true
      node.data: true
      node.ingest: true
      node.store.allow_mmap: false
- You can apply the spec with:
kubectl apply -f elastic-search.yaml
elasticsearch.elasticsearch.k8s.elastic.co/quickstart configured
Behind the scenes, the Operator makes required changes to reach the desired state. This can take a bit of time.
- In the meantime, you can display the status of your cluster by entering the following command:
kubectl get elasticsearch
NAME         HEALTH   NODES   VERSION   PHASE             AGE
quickstart   green    1       7.5.2     ApplyingChanges   56m
In the above output, note that there’s only one node running Elasticsearch.
- You can list the pods running Elasticsearch:
kubectl get pods --selector='elasticsearch.k8s.elastic.co/cluster-name=quickstart'
NAME                      READY   STATUS    RESTARTS   AGE
quickstart-es-default-0   1/1     Running   0          58m
- Similarly, you can scale up your Elasticsearch cluster by specifying
nodeSets.count: 2in yourelasticsearch.yamlfile:
apiVersion: elasticsearch.k8s.elastic.co/v1
kind: Elasticsearch
metadata:
  name: quickstart
spec:
  version: 7.5.2
  nodeSets:
  - name: default
    count: 3
    config:
      node.master: true
      node.data: true
      node.ingest: true
      node.store.allow_mmap: false
- You can monitor the progress with:
kubectl get elasticsearch
NAME         HEALTH   NODES   VERSION   PHASE             AGE
quickstart   green    1       7.5.2     ApplyingChanges   61m
Once the desired stats is reached, the PHASE column will show as Ready:
kubectl get elasticsearch
NAME         HEALTH   NODES   VERSION   PHASE   AGE
quickstart   green    2       7.5.2     Ready   68m
Congratulations, you’ve covered a lot of ground, and now you are familiar with the basic principles behind the Kubernetes Operator! In a future post, we’ll walk through the process of writing our own Operator.
Thanks for reading!